Design

Design

Friday, 27 April 2018

Week 4 ORC - Boy's Bedroom Makeover


Here we are at week 4 of the One Room Challenge.  
For the past few weeks I've been making over a little boy's room and have just six weeks to complete it.   
If you're new here, you can check out my other weeks here:


My little 3 year old client has been away on vacation this week so we haven't' done any more painting, but we do have some new arrivals.  First up is this adorable striped teepee.  I had been looking online for one but stumbled across this one at Walmart. How cute is this?!?!  
I think it's my favourite thing in the room amd more importantly, it's my client's favourite thing too!  


Next up, this adorable rug arrived.  I've mentioned before that cars are a theme in this room as my little client absolutely LOVES them, so this rug is perfect. 
 And for those mothers out there wondering if the rug is practical or not, he uses it all the time.


That's all the progress for this week.  
Be sure to check out the other guest participants here & the featured designers here.


Thursday, 19 April 2018

Boy's Bedroom Makeover - One Room Challenge - Week 3


 I can't believe we are already at week 3 of the One Room Challenge.  If you're new here, over the last few weeks 
I've been a guest participant in this challenge which is hosted by Calling it Home & sponsored by House Beautiful

 I'm making over my client's little boy's room in just 6 weeks.   If you missed it, you can see the first and second weeks here & here.  My goal is to create a bedroom that is timeless, and  although it's for a little boy, I want it to be a bedroom that will grow with him. I'll be mixing black & white with some primary colours.  
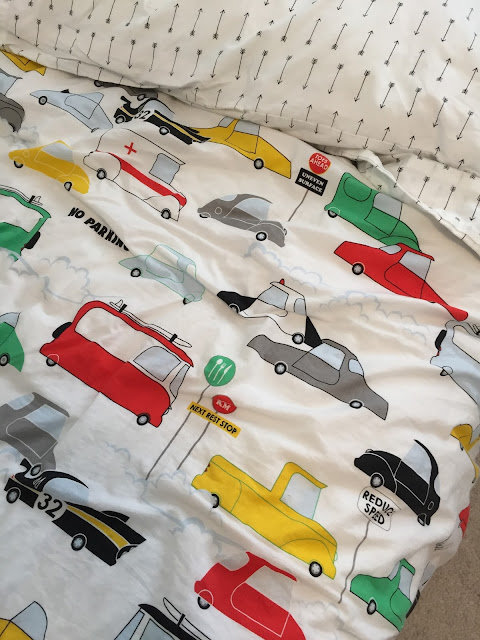
This little boy absolutely loves cars so I will be mixing in some cars in subtle ways. 

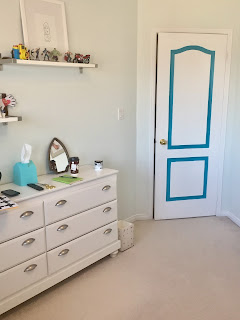
So this week we tackled painting the doors and hardware... what a huge difference it made!  I absolutely love black doors... it's a great way to cover up doors that are less appealing.  If you follow this blog or follow me on instagram, you know I like black, and I paint a lot of things black.  


One of my go-to black colours is Black Jack by Ben Moore, and we used it here but used Behr paint & primer.  
(If you're wondering how we used a Ben Moore colour in a Behr paint, just go to your local Home Depot amd ask them to mix it for you. 
 They have all of the Ben Moore colour codes and will mix it in their paint).  


Next up was spray painting the drawer pulls with Rustoleum.   I love the shape of these pulls,  but just needed a little more black on this side of the room.  Since the pulls are in perfect condition, I used my easy fix for most metal things--a coat of black spray paint.


So here's a little peek at the changes... a little before & after...BIG difference!  
We are slowly getting there.

Be sure to check in next week to see the progress!!!


Wednesday, 11 April 2018

Boy's Bedroom Makeover - One Room Challenge Week 2


Hey there!  
 Here we are at week two of the One Room Challenge hosted by
 Linda from Calling it Home & sponsored by House Beautiful.

 We've made a little bit of progress in this little boy's bedroom.
 If you missed week one, you can see some of the before shots & my vision & inspiration for the room here.  

 This week these gorgeous pillows from Land of Nod & IKEA arrived for the bed along with some new bedding from HomeSense.  


We also started the wall of decals. I can't believe I'm saying this but this was actually fun to do.  The painful part was all the measuring that had to be done first.  We measured out the wall & then put decals every foot starting 6" from the ceiling & staggered the rows.  We also had a foot between each row.   It's best to use a ruler & a level just to make sure things line up properly.  Like I said this is the hard part but putting them on is quite easy.
You will also need something with a straight edge, like a credit card, to help smooth the decals out.  They really just peel off & stick.  You do have a bit of time before they stick so you can shift them if you need to before you smooth them out.
 Like I said, the measuring was the hard part but putting them up was quite easy.


And here's a little teaser...don't they look amazing!?!?
 Such an easy way to add impact in a room.  


So that's it for progress this week. 
 We hope to do some painting next week & of course, we need some new lighting, baskets & rugs etc. for the space.

If you haven't already, be sure to check out the other 
guest participants & featured designers here.


Tuesday, 10 April 2018

Flip Project - Master Loft & Bath Update


Just a quick post to show you some  progress shots of the previously pink & blue master loft & new bath in our flip project (#belmontflip).  You can see the before pics of the whole house here.  This level had no bathroom so we decided to put an ensuite on this floor.  Our master carpenter & partner on the project, Mike from MVH Custom Carpentry, has been working very hard on this floor!  Not only did he build the bathroom but he also built
 the barn door & vanity (below).  


The floors went down last week so now there is just some work to do in the master bath & then this loft is done.  The subway tile, hex tile & floor tile in the bathroom came from Home Depot.  All the lighting on this floor was purchased at Lowes & the laminate flooring came from Restore.


Thursday, 5 April 2018

Boy's Toddler Bedroom Makeover - One Room Challenge Spring 2018 - WEEK 1


I'm excited to be a guest participant in the One Room Challenge  (#oneroomchallenge) this spring which is my first time ever participating in this.  If you haven't heard of it, it's hosted by the lovely Linda from Calling it Home & is held every Spring & Fall.  There are 20 featured designers/bloggers who post weekly & then guest participants (like me) who join in.  The idea is to complete a room over a six week period with posts once a week.  

So here's a peek at the little boy's room I'll be making over.   My 3-year old client absolutely loves cars, so his current comforter is our jumping off point.  (It also helps that his mom has impeccable taste & has made some great design choices).  Normally I'm not a big fan of themes but he lives & breathes 
cars so we are going with a car theme. 


Here's the other side of the room.  You can see that we are off to a great start...the dresser, shelving, bed & bedding are all staying.


Here's my inspo for the room.  
Both photos are from the very talented team of Chango & Co.


Here's my original sketch & some of the things I'm hoping to incorporate in the room...think bright colours with black & white accents.  


You can follow along on my instagram to see more photos & videos.  Also be sure to follow  @oneroomchallenge to see what other designers/bloggers are up to.  It's a great way to connect & get inspired.