Design

Design
Showing posts with label Before and After. Show all posts

Tuesday, 25 August 2020

Kids' Bathroom Before & After


It's been awhile... but I'm back with the kids' bathroom reveal.  We've had a few things happen in the last few months... including a move and a wedding, oh and a little thing called a pandemic.  All these things have kept me busy, and I decided to just take a break from posting. (More on our new home coming soon!)   

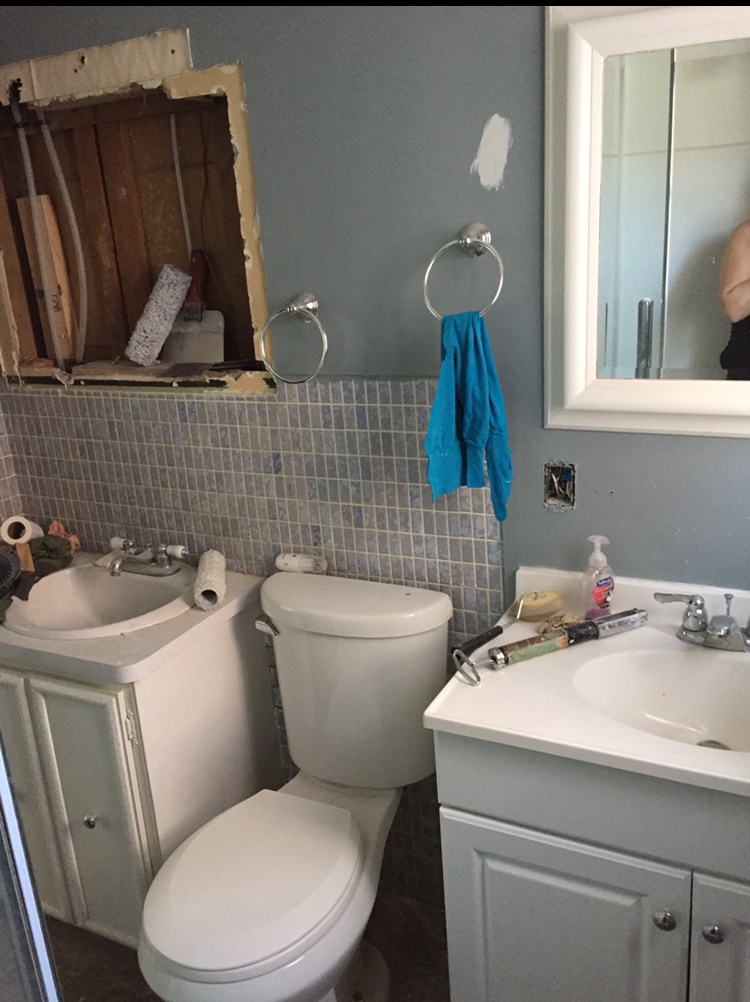
After 10 years of living with the baby blue counters & baby blue tile in the kids' bathroom, I decided that they just had to go, and I couldn't be happier with the outcome!  The shower is just white tile but this floor and vanity needed a change.  

Here's a little peek at what we had before. 


And here's what it looks like now...


 To save money I decided to just frame out the existing builder mirror.  I had the contractor cut the wood in a circle and then I glued it on with heavy duty concrete/mirror glue.  I'm so happy with the outcome.  This way we didn't damage the wall and have to replace the mirror.  To tie in the wood tones in the mirror, I added baskets in the same tone to the bottom of the vanity.


I lucked out and bought this vanity on sale for around $500.00 at Home Hardware.  Unfortunately, it was the last one.  What a great find!  It is good quality, well made with soft closing doors.  This is a similar one.

(Warning about IKEA vanities:  I tried this IKEA vanity first and after it was all put together (by my son) I realized that there was no room for the plumbing.  The only way to accommodate the plumbing would be to cut through the drawers.  After it was all put together I decided I didn't really like the cabinet anyway... it looked small and not that well made.  The good news is IKEA took it back all assembled and gave us a full refund). 


As you can see, I went with a timeless penny tile in black and white with dark grout.  I absolutely love it!  I couldn't find this pattern so I ended up buying the white sheets of penny tile and then a few black sheets of penny tile.  I then took out six white tiles in the middle of each sheet, and glued the black ones to the mesh to make the pattern.  It was a bit time consuming (and hard on the fingers) but well worth it in the end.  I'm definitely going to use penny tile in our new place.

(A little note about penny tile: you need an experienced tiler to put this in.  If the pattern starts to go off, it will stand out, and you can't fix it without replacing it.)


(All photos are mine taken with my iPhone.)

Like I said, the shower and tub were just in a plain white so we were able to keep them.  Can't believe what a huge difference changing out the flooring and vanity has made.


 SOURCES

Vanity:   Home Hardware
Wood & Light:   Home Depot
Hooks & Basket:   IKEA
Counter:   Reno Depot
Baskets (Under Vanity):  Pier One
  Knobs: Canadian Tire
Tap & Sink:  Home Depot
Plants:  Metro
Towels & Shower Curtain:  HomeSense
Penny Tile:   Ceramic Factory Outlet


Wednesday, 5 June 2019

Lilacs & Privacy Fence


What a year for my lilacs!!! I think I have 3x what I had last year.  I've been waiting 9 years for this... definitely worth the wait.   (These are the Charles Joly Lilacs which are an older French Lilac.)  They aren't as fragrant as other varieties but they make up for it in their gorgeous deep purple colour.


And here's a little peek at something we had done last week in our backyard. (Big thanks to my brother-in-law who took time off work to come & help us do this!!!  What a great job!!!)

We took the old ugly railing off & made a privacy fence using these boards from Home Depot. What a big difference this makes.  I'll keep you posted on this... we need to deal with the ugly deck boards now & get them sanded and stained.  They look really bad now that the privacy fence is up.  And, of course, some new furniture would be nice.  Also, I'd love to paint the greying fence around the yard black, but we've had a lot of rain so that may have to wait until the fall.  

Funny how one change leads to more and more changes... think I need a Go Fund Me page to get this backyard done!  


Been working on another bathroom... pics of that 
coming soon!
(All photos are mine taken with my iPhone.)

Thursday, 30 May 2019

Powder Room Gets a Little Love


Hey there... long time no blog...coping with a lot of back pain and haven't posted in a while but have lots of updates.  Been busy working on my builder-basic bathrooms this winter.  I've given all three a little face-lift.   

First up is my powder room on the main floor.  It had this vanity and mirror when we moved in, and I basically just painted the walls a dark blue/grey to add some drama and left it.  One side of the bathroom has this vanity and the other side has the toilet... your basic powder room.  


My inspo for this powder room was the master bathroom I designed for the flip.


First thing I did was lighten up the walls with a custom colour that I mixed.  It's basically white with a slight bit of grey...close to Summer Gray by Valspar.   Once the sweet Laura Ashley tile was down, the vanity and shelves were made (in less than 2 hrs.)  If you're handy, this vanity (and shelving) is really inexpensive to make.  I purchased two pine boards for the vanity similar to this (sorry, couldn't find exact link) that measured 2' x 4' and then stained and sealed them.  The shelving was made with four pine boards that I stained and sealed as well. 


Just need to get a new light, mirror & accessorize then it's done.   (Sink and tap are from Lowes).

So much better... wouldn't you agree!?!


Monday, 20 August 2018

House Flip - Loft Bedroom & Bathroom Reveal


So here we are on the top floor of our little flip... the last room to reveal.  It's hard to believe this little loft once had bright pink walls with light blue (very dirty) carpet.   

Here's a little peek at the before & after of the loft.  


And this is looking the other direction.  You can see from the photo below that the closet used to be on the other side.  We flipped it to accommodate the bathroom. There wasn't a washroom on this level, but we knew that this would be a big selling feature if we put one in... a three-bedroom, two-bathroom home will always sell faster & for more. The kitchen was directly below this side and made it easy to run the plumbing up the wall.   

You can also see that this is where the new closet went.  It sounds crazy but even though we took up more floor space with the addition of the bathroom/closet, the long wall running along the one side the loft actually made the space seem bigger. I'm sure the lighter walls helped too.  (I used the same colour throughout the house... Blizzard Fog by Valspar.)    I purchased these laminate floors on one of my weekly visits to our local Restore... 
these were a big savings to our budget.  


The finishes in this bathroom are similar to the kitchen and bathroom on the main floor.  In case you're wondering where the toilet is, it's to the left of the photo above, and tucked under the slanting roof line.  I took hundreds of photos and for some reason don't have one of the toilet in this bathroom.  You can see we used slate coloured tiles on the floor in a brick pattern, and subway & hex tiles in  the shower.... all from Home Depot.  Most of the accessories are from HomeSense and the lights throughout the house are from Lowes.


(All photos are mine taken with my iPhone.)

Construction & cabinet making on this home were all done by MVH Custom Carpentry.


So that's it for our little flip photos.  
If you are thinking of investing in real estate, the Kitchener, ON area is still very good and much cheaper than the GTA... at least right now. Things may change when the high speed train goes in!


Monday, 16 July 2018

House Flip - Main Floor Bathroom Reveal


This sweet little bathroom wasn't very sweet when we started this flip.  It was a real eyesore with light blue tile running up half the wall, two mis-matched vanities flanking the toilet and a fibreglass surround shower with glass doors... not the most stylish.  

I had to get the best look in the most economical way in this bathroom because it was the last room that was done on the flip.  We didn't have much money left or should I say we had NO money left.   With that in mind, I reused a vanity & sink, and to save time & money, I chose a black & white hex vinyl flooring from End of the Roll which was perfect in the space.  


A big pet peeve of mine is to have the toilet as the focal point in a bathroom.   This bathroom was in the middle of the house and was seen from most rooms so moving the toilet was an added expense but needed to be done for the sake of good design.    In keeping with the modern farmhouse theme & to keep the rooms cohesive, I went with white subway tile from Home Depot to surround the tub...a look that most buyers (male or female) will like...an inexpensive but classic look and very on trend.


When staging bathrooms I like to keep things crisp & white (bathrooms should feel clean) so bath towels, bath mat & shower curtain are all white.    I used the same wall colour in this room as I did throughout the house... Blizzard Fog by Valspar which has a hint of gray in it.   Another little trick I do is place French soaps (sometimes they give off a pretty smell) & Turkish towels in bathrooms.  This gives the bathrooms a hotel feel & makes them feel luxurious.  All accessories in this bathroom are from HomeSense (including the French soap) and the bath towel hooks are from IKEA.  The light fixture, tub & faucets were all purchased from Lowes.  The round mirror is from Bouclair.


It's hard to believe this is the same bathroom...what a transformation!  What a difference it makes to  keep things white and bright!  

One more reveal coming soon... the loft and master bathroom.  If if you missed the other reveals, you can check out the main floor here & kitchen here.

Construction and cabinet making on this home were all done by MVH Custom Carpentry.


Monday, 25 June 2018

House Flip - Kitchen & Bonus Room Reveal


RE Agent Photo

So here is the little finished kitchen
from the flip... which I think you will agree is quite a bit different than before (see below).  As you can tell, there isn't a lot of room in this space.  To complicate matters, one wall had a large window and an entrance, another wall had an entrance & a third wall had a built-in.  The wall space was roughly 10ft x 7ft, and we had to accommodate a fridge, stove & dishwasher... not an easy space to design.  To do this, we had to go with a small dishwasher & fridge... we also bumped the wall back into the bonus room to accommodate the fridge.   I went with a modern farmhouse theme in this kitchen with classic white Shaker cabinets (to appeal to most buyers), bamboo counter tops, a farmhouse sink & kept hardware & fixtures black. 

Construction & cabinet making for this home were all done by MVH Custom Carpentry.


We all know that eat-in kitchens are a big plus when you are selling and since the window looks out onto the garage & walkway, we extended the counter over the window.  This allows for extra seating and also (believe it or not) makes the space feel bigger.   I can't take credit for this idea...I saw this on Fixer Upper with Joanna Gaines ... brilliant idea!  Another thing I did to make the space feel larger was put a very small white dishwasher in the kitchen.  With all the cupboards being white the dishwasher just blends in now and doesn't stand out.  If I had put a stainless steel dishwasher here, the eye would have been drawn to it.


RE Agent Photo


This little space off the back of the house... the bonus room... was an add on to the original house by the previous owner.  It needed quite a bit of work.. the door was moved to accommodate the fridge and allow better access to outside.  Also, one window was removed and an electric fireplace was put in.   To elevate this space and make it appear more current, I decided to add shiplap (painted in Simply White by Ben Moore).  This really changed the space and not only gave it an updated look, but the horizontal lines of the shiplap made it appear larger.  


RE Agent Photo

Because this room is off the kitchen I wanted it to feel like an extension of the kitchen.  I kept the floors the same in both rooms and put an eating area in one corner.  I also staged the other half of the room, which leads outside, as a mudroom to make this small room multi-functional.  Multi-functional rooms are a must in small spaces. The new owners can add hooks and a bench if they want to make it more permanent.  In keeping with the modern farmhouse theme, I chose an industrial light from Lowes and a barn door.  


(All photos are mine taken with my iPhone except where noted).


More photos of the main floor bathroom coming soon!
If you missed the living room & main floor bedrooms you can see them here

Main floor bathroom reveal is up next!